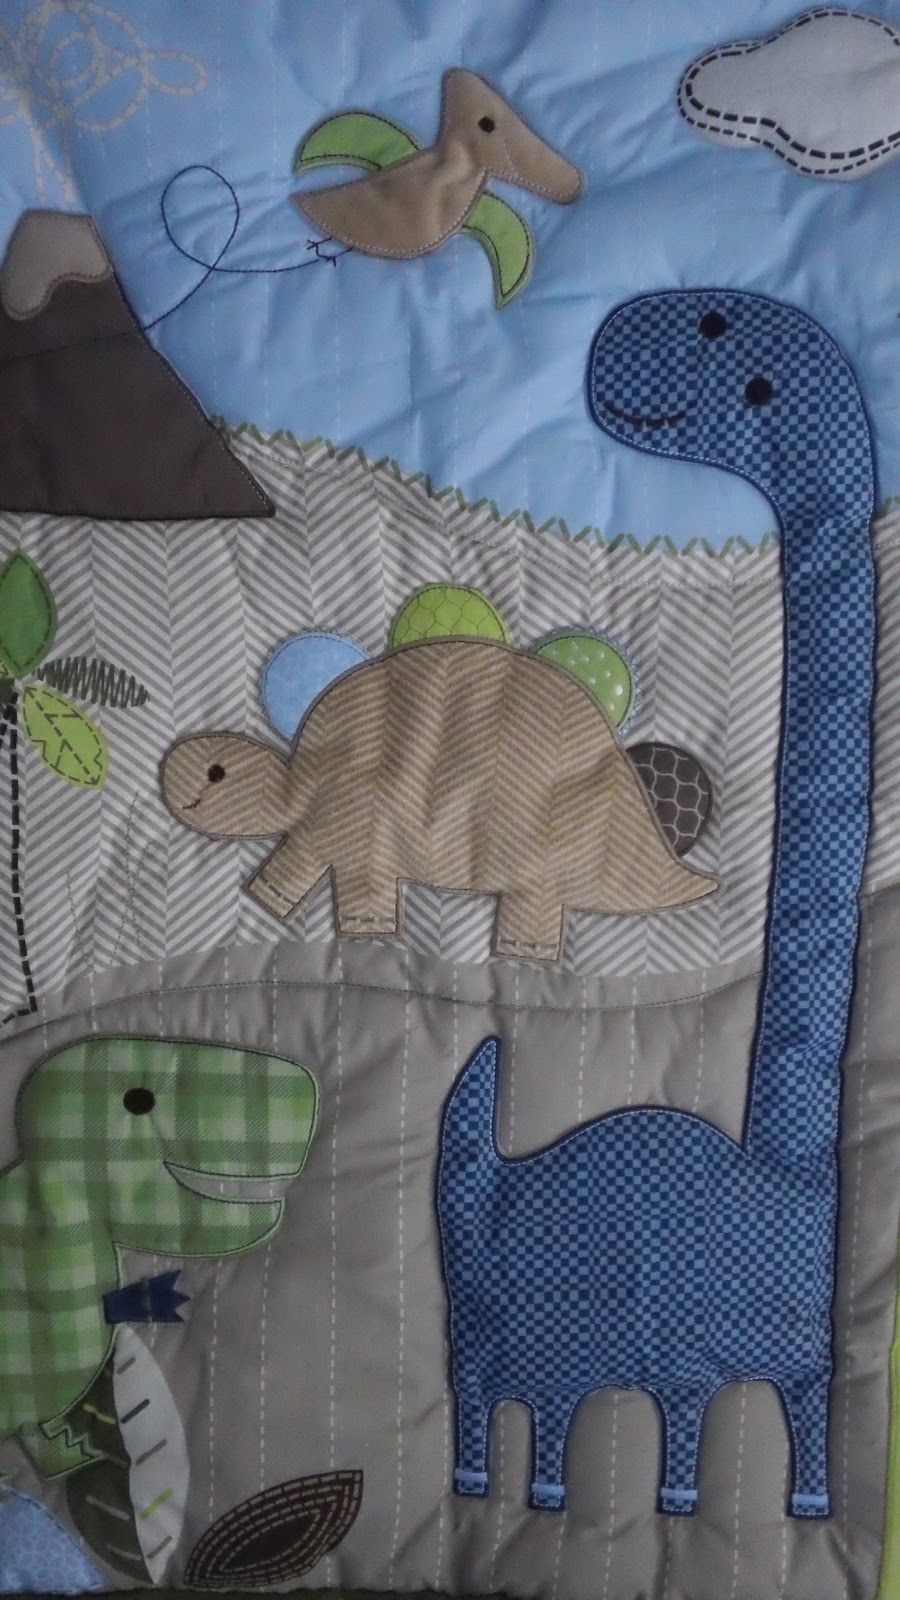
His nursery is the collection called Adorable Dinos by Jill McDonald. This is the comforter of the set, and the picture I used as inspiration for the art-work of the frame.
First, I collected the necessary supplies:
- 8x10 shadow box frame (this one was super easy to use because it had the "spacers" included to give the multi-layered look)
- small pictures or stickers of the theme you want to use (I googled to find a picture of the wall decals that are part of our nursery theme. I printed out the picture on a much smaller scale so that they would fit in the frame appropriately)
- a song lyric or poem (I used the song lyric from Disney's Tarzan "You'll Be In My Heart")
- double-sided tape
- double-sided thick foam tape
- scissors
- sharpie
- about 3 hours of patience
- creativity :-)

You'll notice in the picture that I have a sheet of tan-colored paper, and a sheet of blue-colored paper. These are photo copies of the receiving blankets that are part of the Adorable Dinos collection. To insure a good photo copy, I first ironed the blankets, then placed them in my scanner and saved the blanket pattern as a picture.


Then I cut the blue picture to the size of the 8x10 shadow box frame, as this is going to be the deepest layer (the sky). I truncated the lyrics, chose a font, and printed them top and center right onto the blue sky paper.

Then I took the brown picture and cut it into strips with different widths. This would become the sand dunes.

Then I cut the strips in alternating waves so that no hill would overlap, and so that when separated it would appear as multiple layers of hills. Then I took a sharpie and colored small Vs at the edges of the hills to mimic the grass shown in the comforter.

Then I put each strip of hills on a different layer (spread out by the spacers that came with the shadow box frame).

Then came the long laborious part. Cutting out all of the little dinosaurs. I had to use cuticle scissors because there were so many little corners and details. This is the part that took about 1.5-2hours itself (I'm a very meticulous scissor-er)

Once all the pieces were cut out, I then eyeballed where I wanted them to be placed. Once I was happy with their location, I used double-sided tape to mount pieces flush with the background. For some of the clouds and all the dinosaurs I used the thick foam to make them step out a touch.

NOTE: For some pieces, multiple layers of foam tape were required to get them to stay flat when in the frame. Most notably, the T-Rex required 8 layers of foam tape under his head because his body was on the third layer, but his head stuck out all the way to the background layer. The palm tree on the second layer also needed extra layers of foam tape. This will help keep the pieces more flat looking over time, instead of curling in odd directions.
Once all the pieces were secured in the correct spots, I put all the layers in the frame and made sure everything was secure and straight and viola!
NOTE: Don't forget to windex both sides of the glass before putting it together - to eliminate fingerprints and dust on the inside of the box.
Hang and enjoy the custom keep-sake art!


No comments:
Post a Comment